2. Dev Cube introduction
Dev Cube is a chip integration development tool provided by Broadstream/BOLU (?), including IOT program download, MCU program download and RF performance test. This document mainly introduces the configuration of IOT and MCU program download, and RF performance test, please refer to RF performance test manual.
Dev Cube provides users with the ability to download programs, and supports parameters such as clock, flash, etc. Users can decide whether to encrypt the program, add signatures, replace the program start information file, user resource files, partition tables and other functional configurations according to their own needs.
The concrete functions are as follows:
support the download of IOT applications and MCU applications
support erase, write, read for different models of Flash.
The ability to download various types of files to Flash and verify and read them back.
The download communication interface supports both UART and JLink.
Users can get the latest version of the Dev Cube from Bouffalo Lab Dev Cube.
Double click on BLDevCube.exe in the unzipped folder, select the corresponding chip model in the Chip Selection'' dialog box, and click ``Finish to enter the Dev Cube main interface.
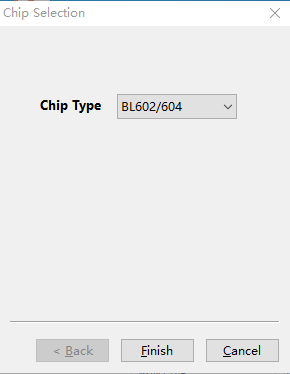
Chip selection
3. Image Composition
Whether it is an IOT program download or an MCU program download, their image composition is the same, as shown in the following figure.
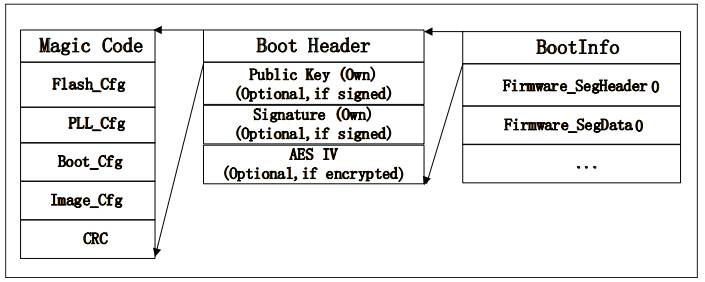
The Downloaded Content Layout
After downloading, the application does not yet work properly with the chip. The boot info must be downloaded to the specified location. The boot info contains the configuration of the PLL, Boot, Flash, etc.; the firmware is an application written by the user.
For example, to download a single-core file, select the corresponding parameters according to your needs, and burn the configuration information of PLL and Flash into the address corresponding to Bootinfo Addr, and burn the compiled bin file of the application into the address corresponding to Image Addr.
4. MCU Program Download
Under the View menu, select the MCU option to open the MCU program download interface, which is mainly divided into the configuration of program download method, configuration of image parameters and configuration of advanced image parameters.
4.1. Configuring the program download method
Configuration parameters include:
Interface: the communication interface to select the program, here select Uart for downloading.
COM Port: When you select UART to download, select the COM port connected to the chip and click Refresh button to refresh the COM port.
Uart Speed: fill in the baud rate when you select UART for downloading, the recommended download frequency is 2MHz, not too high.
Chip Erase: the default setting is False, i.e. no Flash erase when downloading.
Xtal: used to select the type of crystal used for the board.
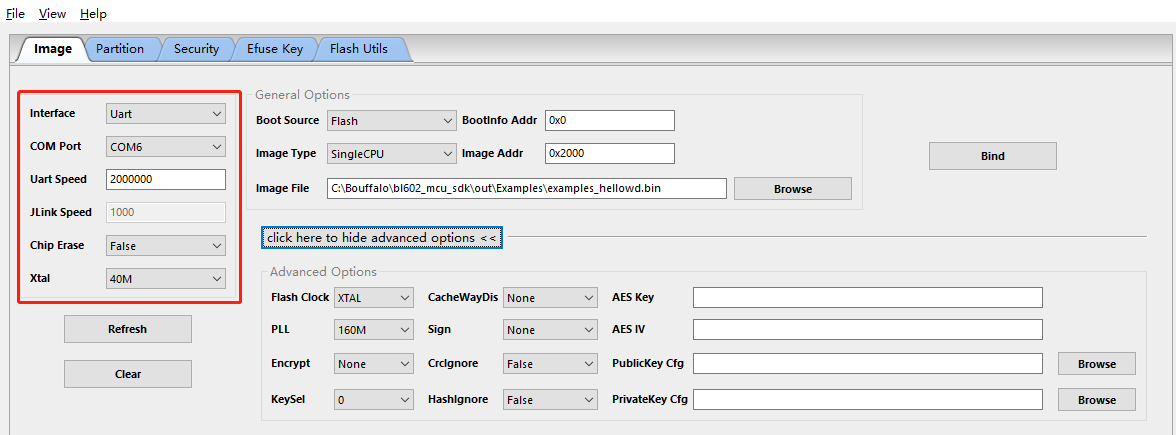
MCU program download method selection interface
4.2. Configuring image parameters
Configuration parameters include.
Boot Source: default is Flash
BootInfo Addr: address of Flash program start parameters, fill in 0x0
Image Type: default is SingleCPU
Image Addr: the address of the application, please fill in 0x2000 or later.
Image File: add the path of the compiled bin file to the Image File.

Mirroring parameter selection interface
4.3. Configuring advanced image parameters
When
click here to show advanced options, advanced image configuration is expanded, with configurable parameters including:Flash Clock: default is XTAL
PLL : PLL clock configuration, default 160M
CacheWayDis : buffer channel disable, default is none
Sign : Select if ECC is needed or not, default is none.
CrcIgnore : If or not CRC check is needed. If the parameter is False, the CRC check is required; if the parameter is True, the CRC check is not required.
HashIgnore : If or not need to do a hash check. If the parameter is False, you need to do a hash check; if the parameter is True, you don’t need to do a hash check.
Encrypt : Select the encryption method and enter the corresponding value in AES Key and AES IV according to the AES encryption method.
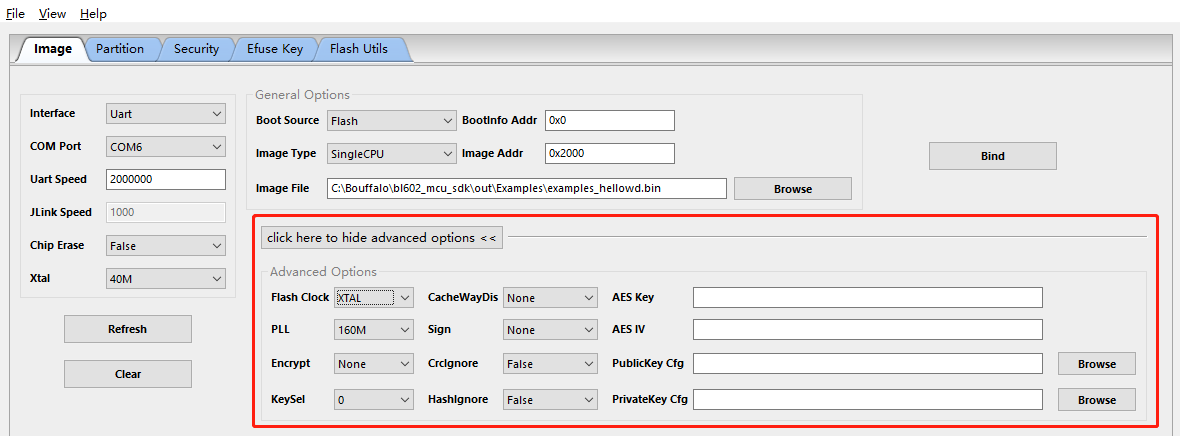
Advanced image parameter selection interface
4.4. Download program
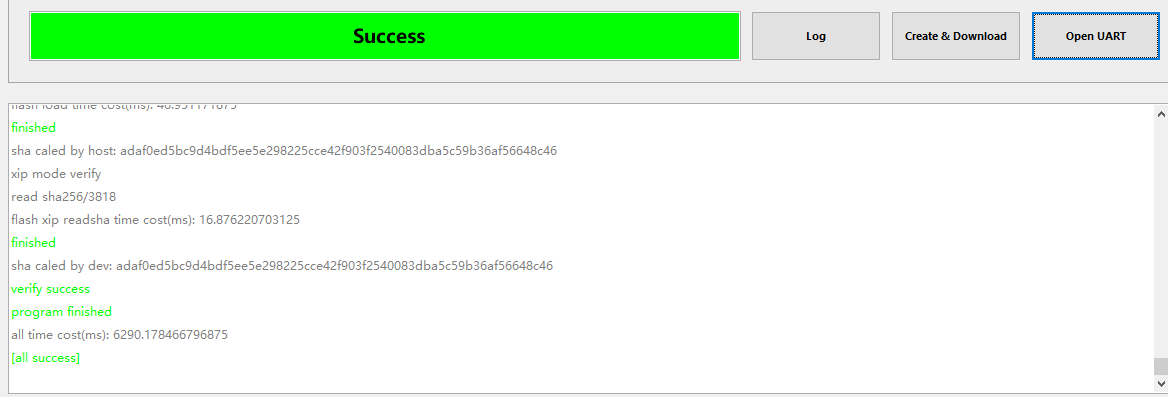
Keep the board’s BOOT pin high, and make the chip reset so that it is in the UART boot download state. Click on
Creat&Program, it will automatically generate the application image and startup parameter configuration file, the following log message appears, the program download is successful
Program Download
Note
If the board is not connected, simply generate the application image and startup parameter profile, by clicking the Creat&Program button.
After a successful download, the board’s BOOT pin is kept low and the chip is made to reset to boot from Flash. This example sends a string message to the PC at 2M baud rate.
log information
5. IOT program download
In the View menu, select the IOT option to enter the IOT program download interface, which is mainly divided into the configuration of program download method and download parameters.
5.1. Configuration program download method
Configuration parameters include:
Interface: the communication interface to select the program, here select Uart for downloading.
COM Port: When you select UART to download, select the COM port which is connected to the chip and click Refresh button to refresh the COM port.
Uart Rate: fill in the baud rate when you select UART for downloading, the recommended download frequency is 2MHz, not too high.
Board: select the board type to be used, in this case IoTKitA, once the board is selected, Xtal will automatically update it to the default values that match the board.
Xtal: select the frequency of the crystal during download, if the board does not have a soldered crystal, here should be elected internal RC32M clock source
Chip Erase is set to False by default, which means that Flash is not erased on download.
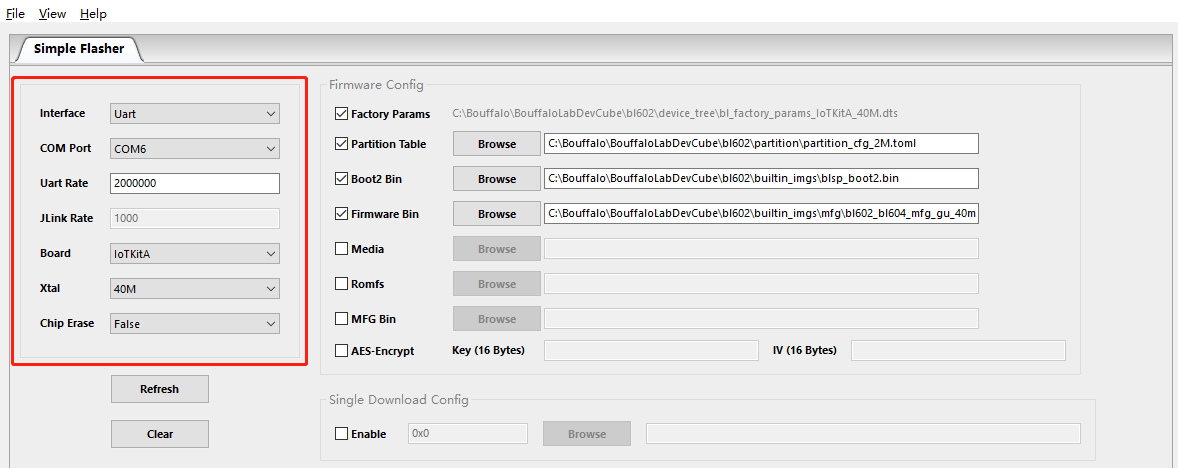
IOT program download method selection interface
5.2. Configuration download parameters
Configuration parameters include:
Partition Table: Use the partition table in the partition folder of the corresponding chip model in the Dev Cube directory, default is 2M.
Boot2 Bin: It is the first Flash program that runs after system boot up, and is responsible for setting up the BLSP security environment and guiding the main program to run, using the Boot2 file in the builtin_imgs folder of the corresponding chip model in the Dev Cube directory.
Firmware Bin: the path to the bin file generated by the user’s compilation.
Media/Romfs: choose one of Media and Romfs, if Media is checked, the file is selected, if Romfs is checked, the folder is selected
MFG Bin: selection of MFG files
AES-Encrypt: To use the encryption function, select the AES-Encrypt option, and enter the Key and IV for encryption in the text box next to it. “, a Byte consists of two characters, so Key and IV each require 32 characters to be entered. Note that the last 8 characters of the IV (i.e. 4 Bytes) must be all 0!
Single Download Config: If Enable is checked, a single file can be downloaded, fill in the starting address of the download in the left text box, and start with 0x.
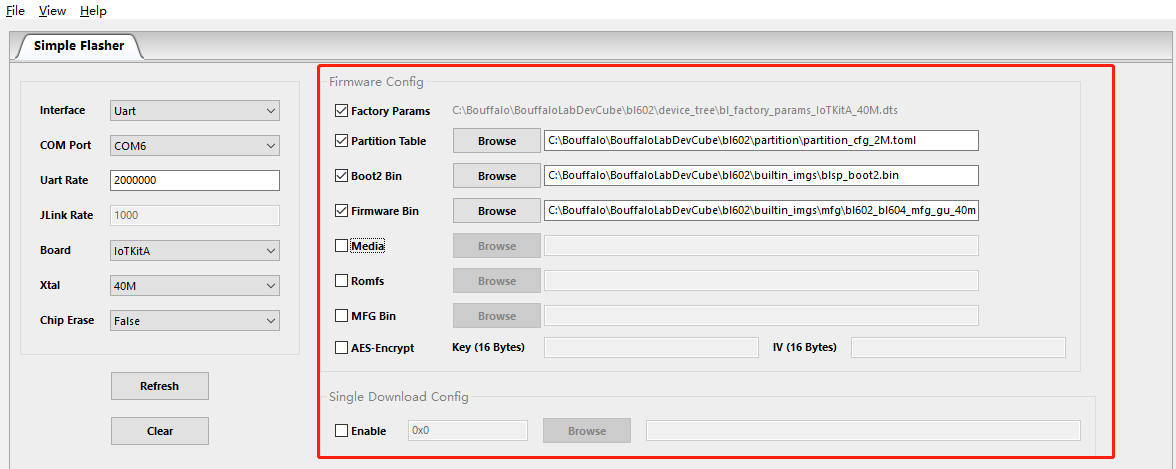
Download parameter selection interface
5.3. Download program
Keep the board’s BOOT pin high, and make the chip reset so that it is in the UART boot download state. Click
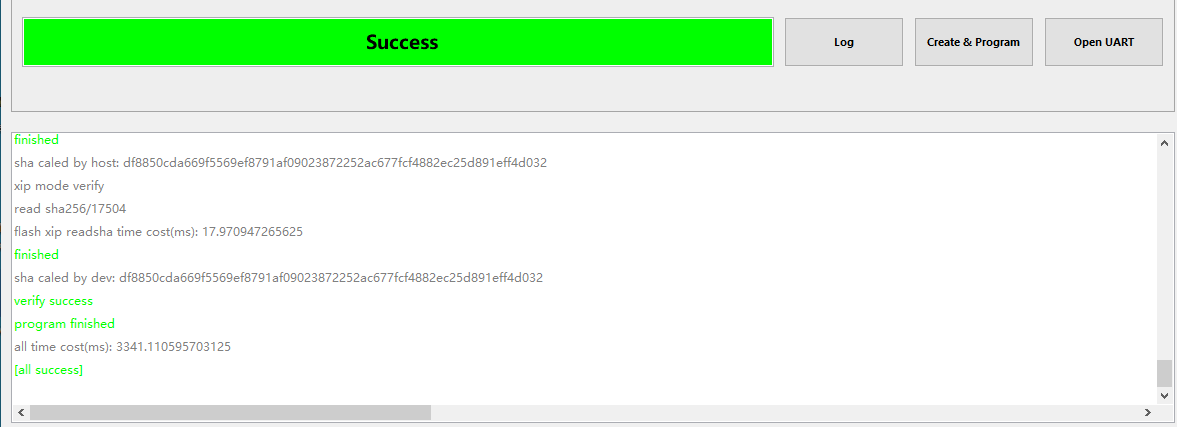
Creat&Download, the application image and startup parameter configuration file will be generated automatically, the following log message appears, the program download is successful
IOT Downloader
Note
If the board is not connected, simply generate the application image and startup parameter profile, by clicking the Creat&Program button.
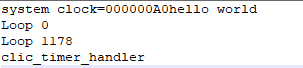
After a successful download, the board’s BOOT pin is kept low and the chip is made to reset to boot from Flash. This example sends a string message to the PC at 2M baud rate.
log message